7 Font Book Tips for Managing Your Mac’s Fonts
As a Mac user you should become familiar with some simple macOS routines. Previewing and installing downloaded fonts is one of them, and it’s easy as can be.
Just double-click on a macOS-compatible font in Finder to preview it. Then press the Install Font button in the preview to install it in Font Book.
But is that all you can do with the native font management application on macOS? Not at all. We’re here to show you what else is possible with seven handy tips for managing fonts on Mac.
1. Create Libraries and Collections
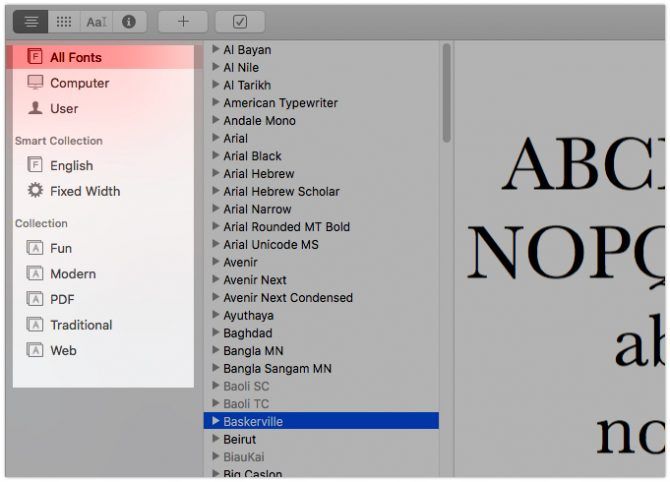
If you collect fonts, or plan to, it’s a good idea to have a system in place to organize them. That’s where font libraries and collections come in.
As you can see in the Font Book sidebar, you already have a few default libraries (All Fonts, Computer, and User) to begin with. To create a new library, click on File > New Library. Once it shows up, you can drag and drop fonts to it from the All Fonts library.
To organize your fonts further, you can use font collections. Click on File > New Collection to set one up and drag and drop fonts to it from any of the font libraries.
Think of font collections as theme-based sub-libraries. You can create a collection for, say, rounding up your favorite fonts, or fonts with a professional feel to use in specific types of projects. The default font collections (Fun, Modern, Traditional, etc.) should give you some inspiration.
Unlike libraries, collections are not groups of fonts. Instead, they’re groups of pointers to fonts. While the fonts in a library end up in a dedicated Finder folder, the fonts in a collection stay in place.
In other words, collections only reference fonts that are already in a font library. Hence, you can feel free to include the same font in multiple collections; you won’t create duplicates if you do so.
2. Create Smart Collections
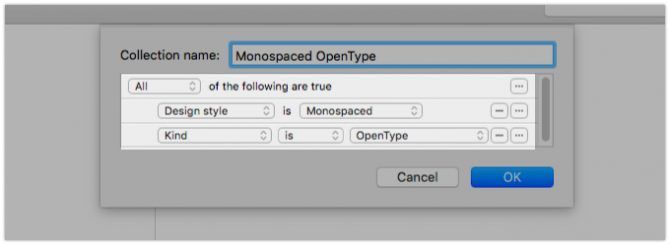
Let’s say you want to isolate OpenType fonts across all libraries. You can do that in a snap with a smart collection. It allows you to filter items based on specific criteria, much like smart group filters do in other Mac apps like Photos, Contacts, and Mail.
In our example, the criterion is OpenType fonts. You can also filter fonts using additional criteria, ending up with monospaced fonts in OpenType format.
To start setting up a smart collection, click on File > New Smart Collection. As with standard collections, you’ll only reference font files, so they won’t move from their original location.
3. Customize Fonts
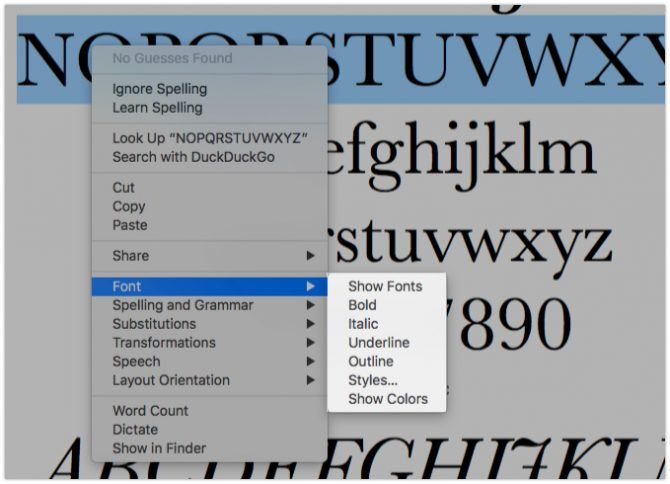
Font Book gives you formatting options to change the look and feel of fonts. You’ll find these under the Font menu when you right-click within a font’s preview. You can emphasize, outline, and underline characters from this menu.
If you click on the Show Fonts and Show Colors menu items, you’ll get a couple of special panels to make further changes. From these panels, you can switch typefaces, scale character sizes, pick font color, etc. This can help make text easier to read.
You might have noticed the same Font menu within Mac apps like Notes, Mail, and Text Edit. It shows up under the Format menu and functions like the one within the Font Book app.
Can’t preview fonts while switching between them in apps? That means you haven’t enabled the previews in the font panel yet. For that, you’ll need to click on the Show Preview option hidden behind the gear icon at the top left in the toolbar.
Once you do, the preview section appears right below the toolbar.
4. Disable and Remove Fonts
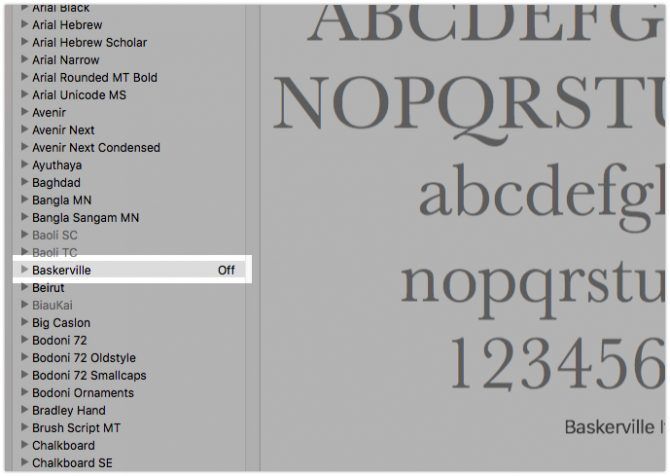
Font Book gives you a couple of options to get fonts you don’t need out of the way. We recommend the first option: disabling fonts. With this option you can take fonts out of action and hide them from the Fonts panel in applications, but keep them on your Mac for future use.
To disable a font, select the font in the Font Book app and click on Edit > Disable. When the confirmation dialog box shows up, click on the Disable button. Once done, you’ll see the label Off next to it in the fonts list.
You can enable the font again, anytime, by clicking on Edit > Enable and confirming your choice. If you select a font collection or one of its families from the sidebar, you can disable either from the Edit menu or the right-click menu.
If you would like to see a font (or a font family) gone for good, you can delete it from the library. All you need to do is select the font from the fonts list and hit the Delete key. You can also take the longer route and select the Remove option from the font’s context menu instead. Of course, you’ll get a confirmation dialog to seal your choice to remove the font.
Keep in mind that if you select a font within a collection and remove it, you’ll see the font disappear only from that collection. It will still show up in the font library and in any other collections it belongs to.
You can delete font collections also. For these, you’ll see a Delete option in menus instead of the Remove option.
5. Remove Duplicate Fonts
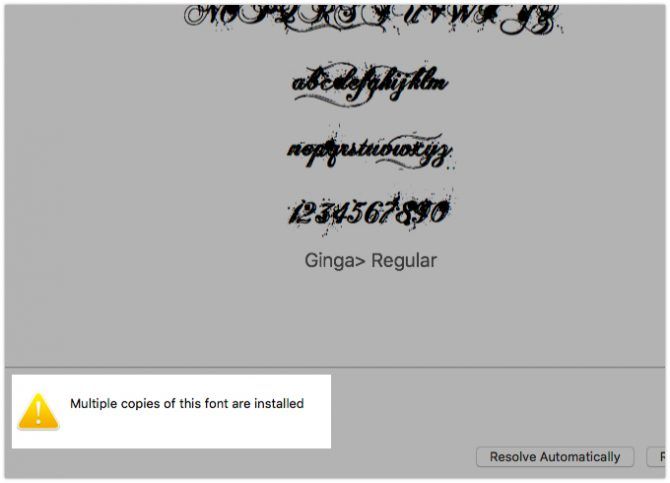
If you select a font that has duplicate files on your Mac, you’ll see a warning sign appear in its preview section in the Font Book app. You won’t see the warning if the duplicate version of the font is inactive or disabled.
You’ll get a couple of options to go with the warning: Resolve Automatically and Resolve Manually.
If you choose the Resolve Automatically option, the app disables the the duplicates. Want to send the duplicate font files to the Trash instead of disabling them when you choose to resolve duplicates automatically? You can tell Font Book to do so from its Preferences panel or settings.
If you select Resolve Manually instead, the app lets you review the duplicates yourself. Not sure which font to delete? Hover over each font to see extra information for it. Then delete the font that comes with the label Duplicate typeface.
You can also bring up the above Resolve options via the font’s right-click menu (by clicking on Resolve Duplicates) or the Edit menu (by choosing Look for Enabled Duplicates).
6. Find Bad or Invalid Fonts
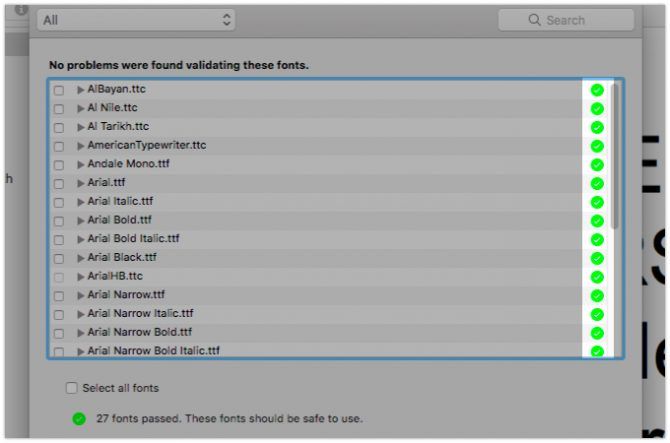
Corrupt fonts can result in erratic macOS behavior and even cause applications to crash often. To fix such issues, you can remove the font in question or reinstall it with a fresh file.
If you need to find out whether a particular font is the culprit behind a misbehaving application, you can have Font Book test if the font has gone bad. To do so, select the font in the Font Book app and click on the Validate Font option in its context menu or in the File menu.
The app then tells you if the font is safe to use by displaying a green check mark next to it. Corrupt fonts get a red X. To remove the fonts marked as corrupt, select their checkbox and click on the Remove Checked button at the bottom of the window.
You don’t have to validate fonts one at a time. You can select multiple fonts in a library and validate them all at once.
7. Copy Fonts to Another Mac
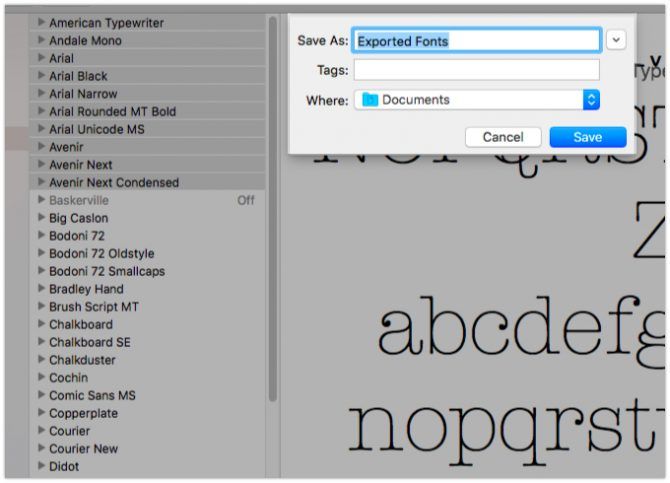
You can move fonts, collections, and libraries between Macs by exporting them to a folder first. Select one or more fonts in Font Book on the Mac you want to copy fonts from. Next, use the File > Export Fonts option to send the corresponding files to a folder of your choice.
If you select a library or a collection in the sidebar, the export option in the File menu shows up as Export Collection.
Once you copy the exported folder to the second Mac, open its Font Book app. There, select the library or collection where you want to import the fonts and then click on File > Add Fonts to install the fonts.
There’s More to Font Book Than Installing Fonts
It’s true, some of the best Mac software comes pre-installed. And Font Book definitely falls into that category. Have you always ignored this app or only ever opened it by accident? It might be time to fire up the app now and discover how useful it can be!